
The Stirred Cocktail

In many modern establishments, stirring is a lost art. Everywhere you go, people seem to be shaking drinks, regardless of their contents. This is unfortunate, because a well stirred drink will have a certain texture that can’t be obtained by shaking.
That being said, there are definitely times when you’ll want to shake a drink, such as if there are any juices or dairy/egg products. However, outside of these situations, stirring is the way to go.
For more discusion on why stirring is not as popular, check out Shaken or Stirred?
Stirring a cocktail results in slower chilling of the beverage due to the more gentle gradual nature of stirring. The goal of proper stirring technique is to do the exact opposite of shaking, i.e. avoiding aerating and agitating the drink. A good stirring motion can be very fast. You are revolving the spoon around the glass resulting in the liquids and ice also revolving at a high rate. You are not sloshing the spoon around in the drink violently, disturbing the ice and introducing a lot of air into the drink.
When making multiple drinks, the downside is that stirring will often take a few seconds longer per drink to both chill and to add the appropriate water content to the final product. This results in taking slightly longer to make each cocktail. A way around this problem is to build each one in a mixing glass, add ice and let them sit in the ice while you prepare the remaining drinks, allowing each to sit in the ice for up to a minute or so before stirring. When the drinks are then stirred, it will take less active time to chill and appropriately dilute the drink.
If the drink will mix well via stirring, i.e. no juices or dairy/egg products, a stirred cocktail will have a much smoother, velvety texture, than a shaken cocktail. This is especially important for the Martini and Manhattan, among many others.
Before we dive into how to stir, we need to talk about a few pieces of equipment that will help you get started.
What you’ll need:
- Mixing glass
- Barspoon
- Julip Strainer
Mixing Glass

Pint glasses will also work with a Boston shaker and are thus more versatile in everyday use.
This is what you will be building and chilling your drink in. Mixing glasses range drastically in style and price, from the fancy, crystal stemmed glasses to the simple and inexpensive. While some of the more expensive glasses are beautiful and the stemmed type will keep your hands from warming the drink, a simple pint glass will work fine, especially if you are just starting out. These can typically be purchased for a couple bucks. Save the fancier glasses until you decide how serious you are about stirring drinks.
Barspoon

There are many styles of barspoons, some of which are useful, while others are a waste of money. So what makes for a good barspoon? Knowing a few essential specs will give you the knowledge to find the right barspoon and avoid the duds out there. The coils on the handle make a difference in how the spoon will twist between your fingers, with tighter coils making for better stirring. The spoon end should be bent forward a little. This will help the spoon move around the base of the glass. Avoid the completely straight spoons, as they won’t stir as well.
A great place to find high quality barspoons as well as other barware is Cocktail Kingdom.
The higher end spoons will have weighted tips and tighter coils on the handle to help with balance and stirring. Some have muddlers. These are typically designed better than the lower end spoons. That being said I have seen and unfortunately purchased barspoons from “fancy stores” that are some of the poorest performing spoons I’ve ever seen. A “cute” or “designer” spoon may look nice on display, but fail in actual use, making stirring more difficult and thus less accessible to the beginner.
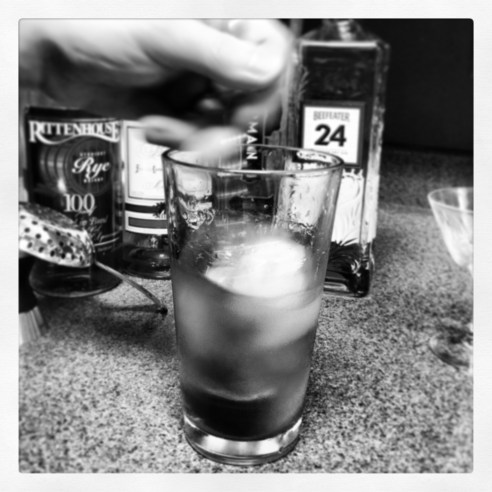
I’ve had success with the red topped barspoons from Sur La Table (pictured above).
Be careful with the cheaper red topped spoons. While some are actually quite good low-cost options, others have very wide coils, are unbalanced and make stirring more difficult. Compare a few before buying and you will be better informed and avoid making the mistakes I made when first buying barspoons.
Julip Strainer


The julip strainer is the strainer of choice for a stirred cocktail. Not a lot of variability in these, although some are available with different finishes. That being said, the type sold in most stores works quite well.
Many folks utilize different techniques, especially once they have practiced for a while. I have found that this method of hand positioning is a great way to learn the basic motions of stirring. Eventually, you may discover that slight variations in finger positioning make you more comfortable/effective at stirring.
How to Prepare a Stirred Cocktail:
- Chill a mixing glass. This is also a good time to chill your cocktail glass.
- Adding water to the ice will increase the surface area in contact with the glass as well as to help prevent the ice from sticking.
- Alternatively, you could place the glass in the fridge/freezer, just be sure to pull it out a little before serving to prevent the glass from looking too “frosty.”
- Begin measuring your ingredients and building your cocktail in the glass.
- I usually start with bitters because they are the smallest in quantity but highest in flavor.
- If you slip up and add too much, it will be less wasteful/expensive to dump the bitters out and start over.
- Add ice to fill the glass at least 3/4 full.
- The small amount of ice that you are chilling the cocktail glass in is not enough.
- Let the cocktail glass continue to chill while you stir the drink. You can always add this ice in as you stir if you need to fill the glass up more.
- Take your stirring spoon and place it in the bottom of the glass with the back of the spoon toward the outside of the glass.
- Prepare your finger positioning.– THIS TAKES PRACTICE.
- Hold the shaft of the spoon between your index and middle finger. Use your thumb to support and secure the spoon.
- Your index finger is in front of the spoon and your middle finger is behind the spoon.
- Begin to push the spoon back and forth between your index and middle finger again resting your thumb on the spoon to secure it but allowing the spoon to move by the actions of these two fingers.
- Your index finger pushes the spoon toward you then your middle finger pushes it away from you.
- While you are pushing your fingers back and forth, away and toward, away and toward, the spoon will move around the glass in a circular motion.
- Keep your hand over the drink and your forearm and wrist essentially stable, let your fingers do the work.
- A decent barspoon will be much easier to do this with and will glide around the base of the glass, while other straighter spoons will be more clunky at this maneuver.
- Stirring takes practice and you will likely look and feel somewhat clumsy at first, but with practice you will improve.
- Continue stirring for 20-60 seconds.
- At first you will be slow to move around the glass and will need to stir for longer to chill your drink.
- As you get better, your revolutions will also become much faster and more effortless and your cocktail will chill faster.
- If you have higher proof spirits, you may need to stir longer to appropriately dilute your cocktail.
- Add more ice if needed to keep the glass at least 3/4 full.
- When you think your mix is adequately stirred, give it a taste.
- If making a cocktail for someone else, you may want to use a straw to taste.
- If you are just making one for yourself, feel free to use your barspoon.
- If it tastes cold and appropriately dilute, move on to straining, otherwise keep stirring a little longer.
- Before pouring your cocktail, remember to discard the ice from your chilling cocktail glass.
- Place a julep strainer on top of the mixing glass and then strain the drink into the serving glass.
- You can do this with the spoon in or out of the mixing glass, just don’t knock anything over with the spoon sticking out if you leave it in.
- Garnish your cocktail (if called for).
-
ENJOY!


25 Responses to “The Stirred Cocktail”
[…] does your drink contain juices, dairy/eggs? If so you are in the right place. If not, consider stirring your […]
[…] The Stirred Cocktail […]
[…] James Bond’s first Martini in Ian Fleming’s famous spy novels, the Vesper appeared in Casino Royale (1953). It was named after the female lead, Vesper Lynd, not the little motorbike. The Vesper was actually created by a friend of Fleming, but Fleming liked it so much he put it in Casino Royale, making history, both by giving Bond a signature cocktail and by drastically increasing the popularity of shaking cocktails that are better made stirred. […]
[…] you’ve measured, stirred/shaken and now garnished your cocktail. The only thing left to do is sit back and enjoy your […]
[…] to make the drink incorrectly due to lack of measuring and shaking a cocktail that should be stirred. These places preferred to shake high fructose corn syrup laden monstrosities with flavored vodka […]
[…] American Drinks (1895). Kappeler also suggests that the cocktail should be shaken, but you know better, do your self a favor and stir this […]
[…] the hardwood charcoal aged Boulevardier to a chilled mixing glass. Add ice and stir until well chilled. Rinse a cocktail glass with Peat Monster Scotch. Strain the chilled drink into […]
[…] the Nolet’s Gin, Dolin Blanc, Aperol and Peach Bitters to a chilled mixing glass. Add ice and stir until well chilled. Strain into a chilled cocktail glass. Drop a few drops of rose water on top and […]
[…] Unfortunately, something always seemed to be lacking. Maybe it’s because I’m more of stirred cocktail guy and would rather just drink a “normal” Negroni most days. That being […]
[…] to a chilled mixing glass. Fill a cocktail glass with applewood smoke and cover. Add ice and stir the cocktail until well chilled. Remove the cover from the smoked glass and strain the cocktail […]
[…] Demerera Syrup, Angostura Bitters, Black Walnut Bitters and Maple Bitters. Add ice and give a quick stir. Rinse a chilled rocks glass with a generous amount of Laphroaig and then leave the surplus in the […]
[…] the Fino Sherry, Sweet Vermouth and Orange Bitters to a chilled mixing glass. Add ice and stir until well chilled. Strain into a chilled cocktail glass and garnish with the lemon […]
[…] Domaine de Canton, Salers, Angostura and lavender bitters to a chilled mixing glass. Add ice and stir until well chilled. Strain into a chilled cocktail glass. Drop the Urban Moonshine Bitters on top […]
[…] Strega, Amaro Averna, Aromatic and Citrus Bitters to a chilled cocktail glass. Add ice and stir for a few seconds. Strain it into a chilled rocks glass over a large ice cube (if […]
[…] (don’t have it? try a few dashes of green Chartreuse) to a chilled mixing glass. Add ice and stir until well chilled. Rinse a cocktail glass with Scotch (I used Oak Cross from Compass Box). Strain […]
[…] and 3 full droppers of Bittermens Hopped Grapefruit Bitters to a chilled mixing glass. Add ice and stir until well chilled. Strain into a chilled cocktail glass and garnish with the […]
[…] cocktails (here’s looking at you Aviation and Last Word), for the most part I’m a stirred kinda guy. That being said, this drink is delicious and it will even make your friends that […]
[…] sherry, Bittermens Burlesque and Hopped Grapefruit bitters to a chilled mixing glass. Add ice and stir until well chilled. Strain into a chilled cocktail glass. Garnish with the grapefruit […]
[…] being more of stirred guy, sours are not my typical go to drink. That being said, I do enjoy them from time to time. I […]
[…] extra dry vermouth), yellow and green chartreuse and Malort to a chilled mixing glass. Add ice and stir until well chilled. Strain into a cocktail glass and garnish with the orange […]
[…] whisky, absinthe, curaçao, maraschino and Angostura bitters to a chilled mixing glass. Add ice and stir until well chilled. Strain into a chilled cocktail glass and garnish with a lemon twist and an […]
[…] the rye whiskey, Aperol and Cocchi Americano to a chilled mixing glass. Add ice and stir until well chilled. Strain into a chilled cocktail glass and garnish with an orange […]
[…] into a cocktail. The loving ode written to the art of stirring one’s cocktail in a post on drinkstraightup.com is a prime example of the passion brought to the matter by keen mixologists. A part of it reads: […]
I can’t express my appreciation for this blog enough. It’s exactly what I was looking for, that is, a bit more depth to the usual “add these ingredients together” recipe. I’d really like to start making cocktails at home, but I’ve just been doing what seemed right/what I remember from watching. Having everything spelt out is just what I need. Thanks
Marie,
Thanks so much for the kind words! I’m glad it’s coming in handy for you.